devlog #1 - Procedural Map Generation
Welcome to the first official devlog post! You can still read the previous devlog entry to understand the project and the idea behind. In this entry, I’ll mainly share some map improvements I’ve been working on.
- Bug Fixing: Player spawning on a non-walkable tile
- Bug Fixing: Pixel artifacts between the tiles
- Mechanics/Systems: Generating the map
- Debugging: Display tile coordinates
- Content: Meet Mr. Rabbit
- Final result
- Closing Thoughts
Bug Fixing: Player spawning on a non-walkable tile
Originally, the player had a hardcoded spawn point at (0,0) regardless of the tile. But, since the stones are randomly generated on the map, it can lead to situations where the player spawns on a non-walkable tile.
fn spawn_player(mut commands: Commands, tileset: Res<TilesetMain>) {
    let map_position = MapPosition::new(0, 0); // hardcoded spawn :(
    let (sprite_x, sprite_y) = calculate_sprite_position(&map_position);
    commands.spawn(PlayerBundle {
        player: Player,
        position: map_position,
        sprite: SpriteSheetBundle {
            texture_atlas: tileset.0.clone(),
            transform: Transform::from_xyz(sprite_x, sprite_y, Z_INDEX_ACTOR),
            sprite: TextureAtlasSprite::new(SPRITE_IDX_PLAYER),
            ..Default::default()
        },
    });
}
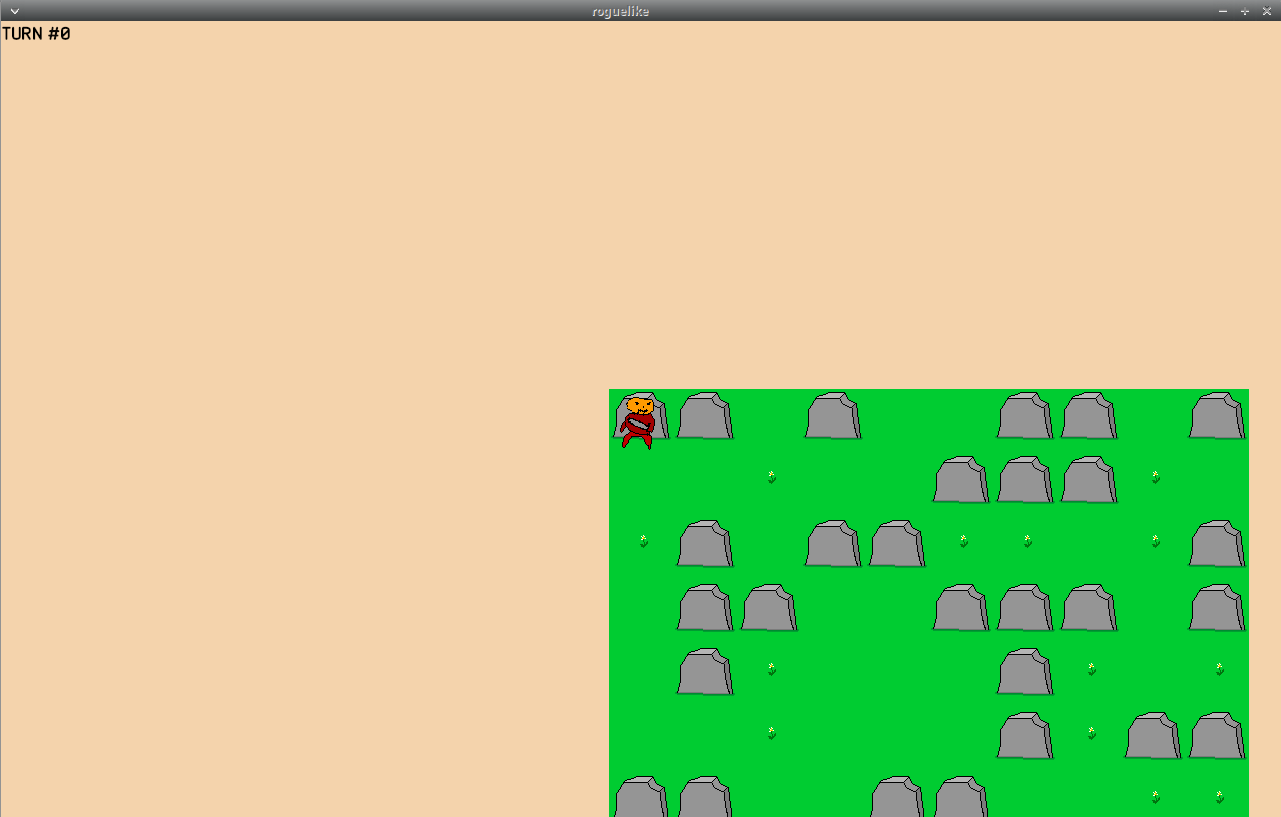
bug: Player spawning on a stone
Solution: To fix this, the player’s spawning position needs to be given by
the Map. It implies the map being created before the player. To make sure
things are done in this order, I decided to split the previous
GameState::Initializing state in two:
#[derive(Debug, Clone, Copy, Default, Eq, PartialEq, Hash, States)]
pub enum GameState {
    #[default]
    Uninitialized,
    InitializingMap,
    InitializingPlayer,
    PlayerTurn,
    EnemyTurn,
}
    .add_systems(OnEnter(GameState::InitializingMap), initialize_map)
    .add_systems(OnEnter(GameState::InitializingPlayer), initialize_player)
When initializing the player, its spawn position is given by a method
implemented via the Map (now taken as a parameter):
pub fn generate_random_spawning_position(&self) -> MapPosition {
    let spawnable_positions: Vec<_> = self
        .tiles
        .iter()
        .enumerate()
        .filter(|(_, tile)| tile.is_walkable())
        .map(|(index, _)| index)
        .collect();

    if spawnable_positions.is_empty() {
        panic!("There are no spawnable positions");
    }

    let mut rng = rand::thread_rng();
    let index = *spawnable_positions.choose(&mut rng).unwrap();

    MapPosition::new(index % self.width, index / self.height)
}
fn initialize_player(
    mut commands: Commands,
    mut game_next_state: ResMut<NextState<GameState>>,
    query_map: Query<&Map>,
    tileset: Res<TilesetMain>,
) {
    let map = query_map.single();
    let map_position = map.generate_random_spawning_position();
    let (sprite_x, sprite_y) = calculate_sprite_position(&map_position);
    commands.spawn(PlayerBundle {
        player: Player,
        position: map_position,
        sprite: SpriteSheetBundle {
            texture_atlas: tileset.0.clone(),
            transform: Transform::from_xyz(sprite_x, sprite_y, Z_INDEX_ACTOR),
            sprite: TextureAtlasSprite::new(SPRITE_IDX_PLAYER),
            ..Default::default()
        },
    });
    game_next_state.set(GameState::PlayerTurn);
}
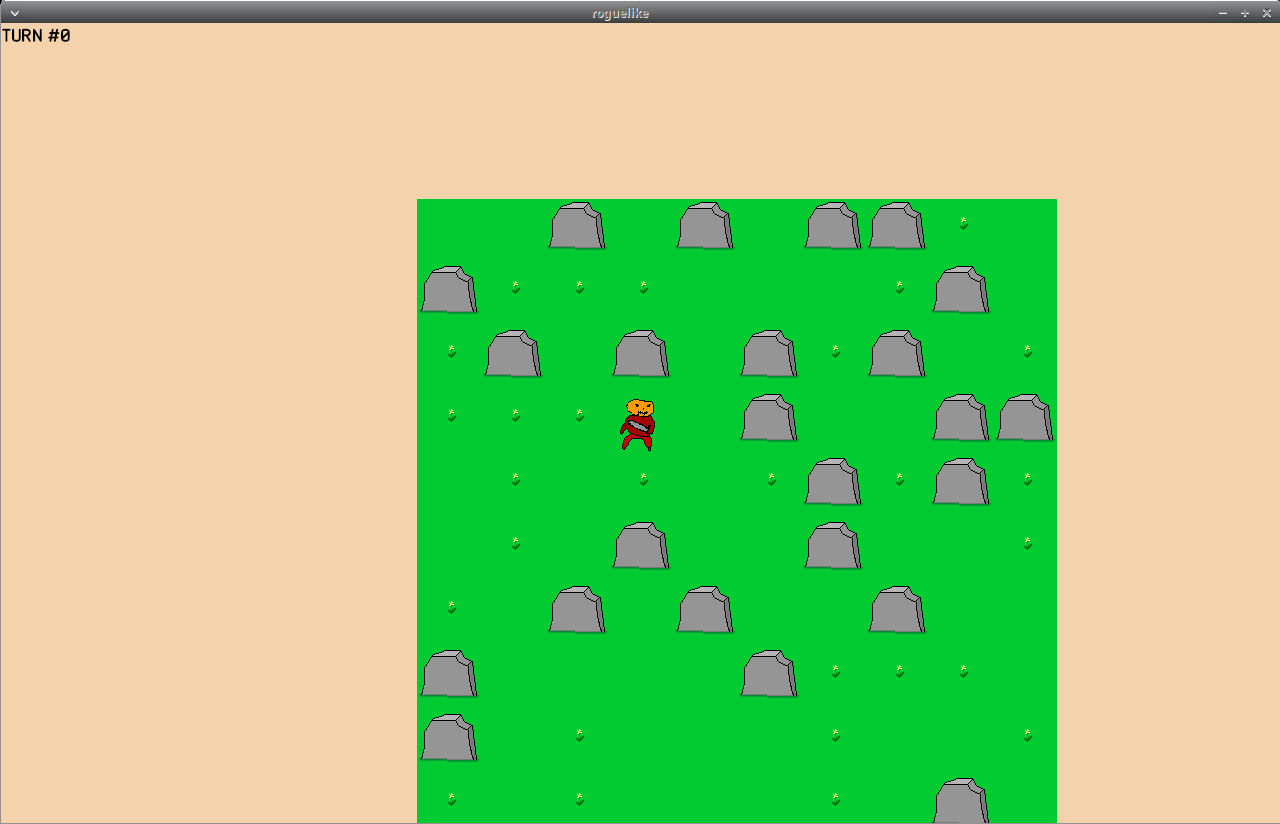
Player spawning on a random walkable tile
Bug Fixing: Pixel artifacts between tiles
There’s an issue I had and that have been bothering me recently. It’s related to the way tiles are displayed on screen. If you pay close attention to the following image, you’ll notice vertical pixel artifacts between the tiles.
Pixel artifacts between the tiles
Solution: It seems to be a known issue related to Bevy’s MSAA.
After turning it off with insert_resource(Msaa::Off), the pixel artifacts were gone. 😁
No pixel artifacts anymore
Mechanics/System: Generating the map
With these issues fixed, I could focus on something more interesting: generating the map procedurally. Naively, one could think that putting rocks randomly on the map is enough, but in order to provide a better playability, we need to take into account a couple of criteria:
- Harmony: Using a total random placement feels heavily artificial. It’s more enjoyable to walk in a terrain that looks somewhat natural or following a certain pattern.
- Walkable path: In its simplest form, the path from the beginning to the end of a level must be walkable. It means that a player should never spawn trapped between rocks.
I haven’t decided yet what type of goal I want to put in the level, so I decided to focus on the first criteria for the moment. To generate the map procedurally, I decided to explore using Cellular Automaton and Perlin Noise.
With Cellular Automaton
I never considered that Cellular Automaton could bring such flair to 2D map generation. It hit me when I stumbled upon these blog posts:
- Procedural Generation with Cellular Automata, by Bronson Zgeb
- Procedural Level Generation in Games using a Cellular Automaton, by Kim Pedersen
Exciting stuff, especially for someone like me who’s dabbled in cellular automata before, with several implementations of Game Of Life and even my take on Brian’s Brain using Vulkan and Rust last year (see it here).
For generating level procedurally, I went with the same rules as Game of Life. here’s the process I took for creating my cellular automaton:
Define a struct representing a cellular automaton and an enum representing the cellular states:
#[derive(Clone, PartialEq, Eq)]
pub enum CellularState {
    Alive,
    Dead,
}

pub struct CellularAutomaton {
    pub width: usize,
    pub height: usize,
    pub cells: Vec<CellularState>,
}
Initialize the cellular automaton with random alive cells:
impl CellularAutomaton {
pub fn new(width: usize, height: usize, alive_probability: f64) -> Self {
    let cells = (0..width * height)
        .map(|_| {
            if rand::thread_rng().gen_bool(alive_probability) {
                CellularState::Alive
            } else {
                CellularState::Dead
            }
        })
        .collect();

    Self {
        width,
        height,
        cells,
    }
}
The most important operation for making the cellular automaton evolves to the next generation is to apply rules to the cells. In Conway’s Game of Life, a cell’s state is determined based on its Von Neumann neighbors:
/// Returns the flat indices of all Von Neumann neighbors for a given cell in a
/// cellular automaton, considering borders and corners.
///
/// # Arguments
///
/// `automaton`: A reference to a `CellularAutomaton` structure.
/// `i`: The flat index of the target cell in the cells vector.
///
/// # Returns
///
/// A vector containing flat indexes representing the target cell neighbors.
pub fn enumerate_neighbors(
    automaton: &CellularAutomaton,
    i: usize,
) -> Vec<usize> {
    let mut neighbors = Vec::new();
    let x = i % automaton.width;
    let y = i / automaton.width;
    // left neighbor
    if x > 0 {
        neighbors.push(i - 1);
    }
    // right neighbor
    if x < automaton.width - 1 {
        neighbors.push(i + 1);
    }
    // top neighbor
    if y > 0 {
        neighbors.push((y - 1) * automaton.width + x);
    }
    // bottom neighbor
    if y < automaton.height - 1 {
        neighbors.push((y + 1) * automaton.width + x);
    }
    // top right neighbor
    if x < automaton.width - 1 && y > 0 {
        neighbors.push((y - 1) * automaton.width + x + 1);
    }
    // top left neighbor
    if x > 0 && y > 0 {
        neighbors.push((y - 1) * automaton.width + x - 1);
    }
    // bottom right neighbor
    if x < automaton.width - 1 && y < automaton.height - 1 {
        neighbors.push((y + 1) * automaton.width + x + 1);
    }
    // bottom left neighbor
    if x > 0 && y < automaton.height - 1 {
        neighbors.push((y + 1) * automaton.width + x - 1);
    }

    neighbors
}
Finally, implement a transition function to create the next cellular automaton generation based on rules:
impl CellularAutomaton{
        /// Advances the cellular automaton to the next generation based on
    /// predefined transition rules.
    ///
    /// This function applies rules to each cell, determining its state in the
    /// next generation based on the count of alive neighbors. The transition
    /// follows standard rules for Conway's Game of Life.
    ///
    /// # Remarks
    ///
    /// - Living cells with fewer than 2 or more than 3 alive neighbors die.
    /// - Dead cells with exactly 3 alive neighbors become alive.
    /// - Cells with 2 or 3 alive neighbors remain in their current state.
    pub fn transition(&mut self) {
        let mut next_generation = self.cells.clone();
        for (i, c) in self.cells.iter().enumerate() {
            let alive_neighbors =
                count_neighbors_in_state(self, i, CellularState::Alive);

            next_generation[i] = match c {
                CellularState::Alive => {
                    if alive_neighbors < 2 || alive_neighbors > 3 {
                        CellularState::Dead
                    } else {
                        CellularState::Alive
                    }
                }
                CellularState::Dead => {
                    if alive_neighbors == 3 {
                        CellularState::Alive
                    } else {
                        CellularState::Dead
                    }
                }
            }
        }
        self.cells = next_generation;
    }
}
Now to convert the CellularAutomaton into an usable Map, I simply
implemented the from trait (see related commit):
impl From<CellularAutomaton> for Map {
    /// Constructs a `Map` using a cellular automaton.
    ///
    /// # Arguments
    ///
    /// - `ca`: A `CellularAutomaton` initialized struct.
    ///
    /// # Returns
    ///
    /// A `Map` where the tiles are determined by the cellular automaton state.
    fn from(ca: CellularAutomaton) -> Self {
        Self {
            width: ca.width,
            height: ca.height,
            tiles: ca
                .cells
                .iter()
                .map(|cellular_state| match cellular_state {
                    CellularState::Alive => TileType::GrassWithStone,
                    CellularState::Dead => TileType::Grass,
                })
                .collect(),
        }
    }
}
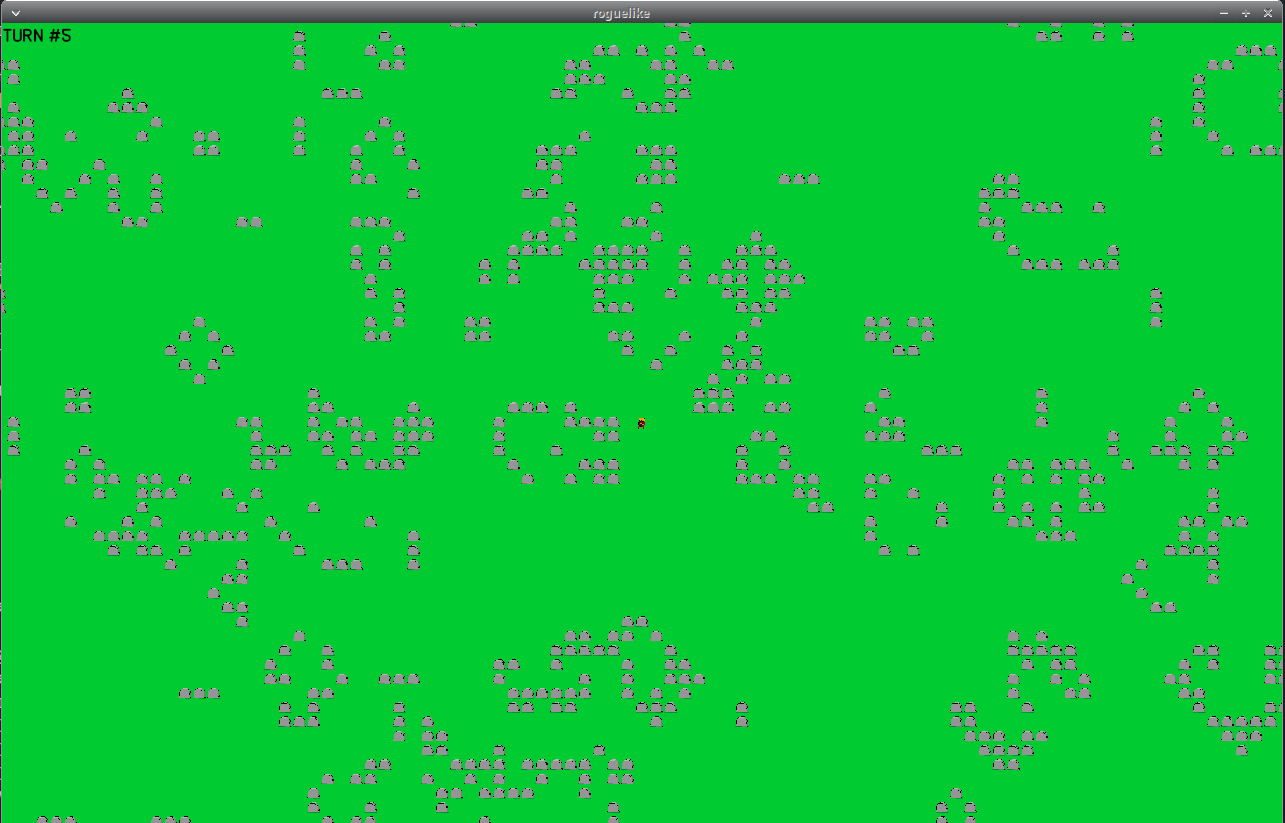
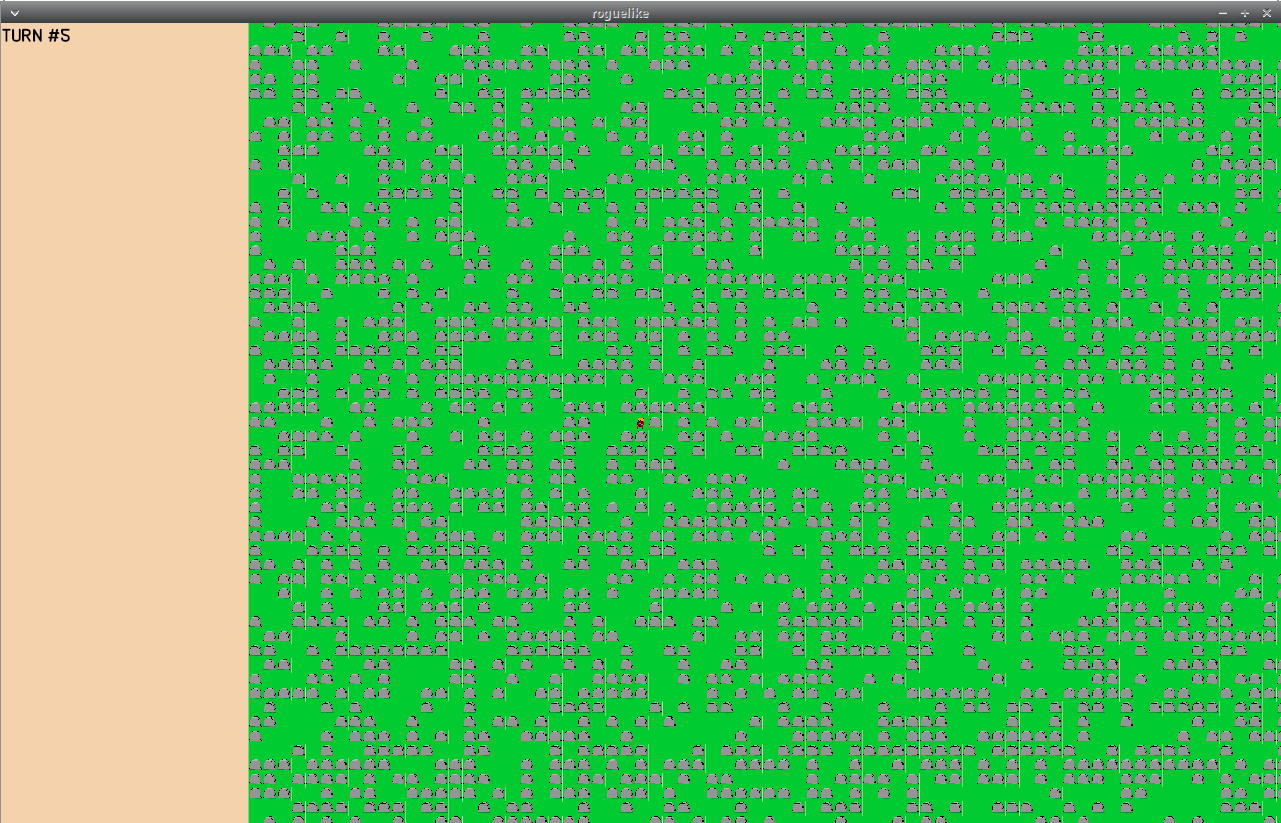
Map created with a Conway's Game of Life automaton initially set to 50% alive cells and after 50 steps
For those familiar with this automaton, the end result speaks for itself. But satisfaction wasn’t enough; I decided to add a smoothing touch. After the automaton runs, I smooth the result by setting dead cells as alive if they have more than 3 alive neighbors. This process repeats until no further changes occur.
impl CellularAutomaton{
    /// Applies a smoothing operation to the cellular automaton, updating cell
    // states based on neighboring conditions.
    ///
    /// It iteratively processes the current generation of cells, updating each
    /// cell's state based on the count of alive neighbors. The process
    /// continues until no further changes occur.
    pub fn smooth(&mut self) {
        let mut current_generation = self.cells.clone();
        let mut has_changed = true;

        while has_changed {
            has_changed = false;
            let mut next_generation = current_generation.clone();

            for (i, c) in current_generation.iter().enumerate() {
                let alive_neighbors =
                    count_neighbors_in_state(self, i, CellularState::Alive);

                if c == &CellularState::Dead && alive_neighbors > 3 {
                    next_generation[i] = CellularState::Alive;
                    has_changed = true;
                }
            }
            current_generation = next_generation.clone();
        }
        self.cells = current_generation;
    }
}
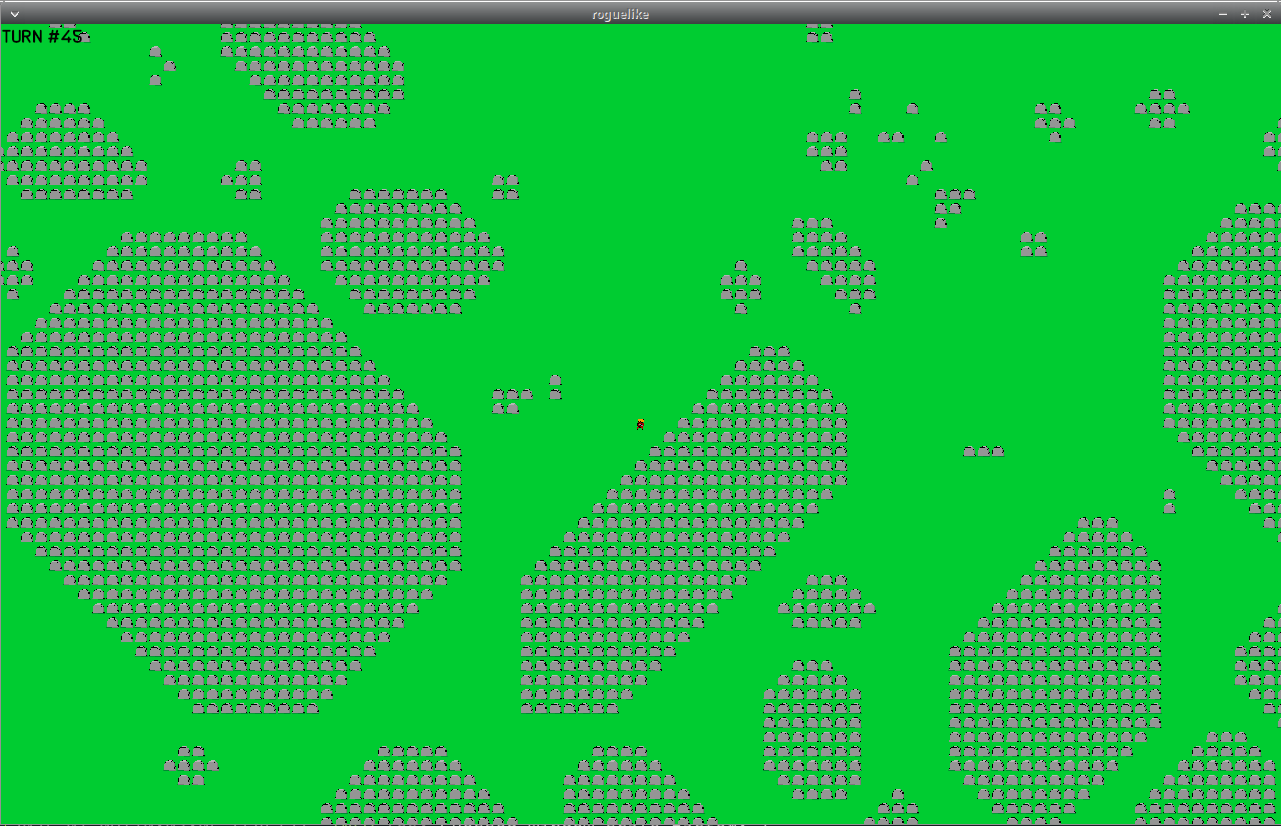
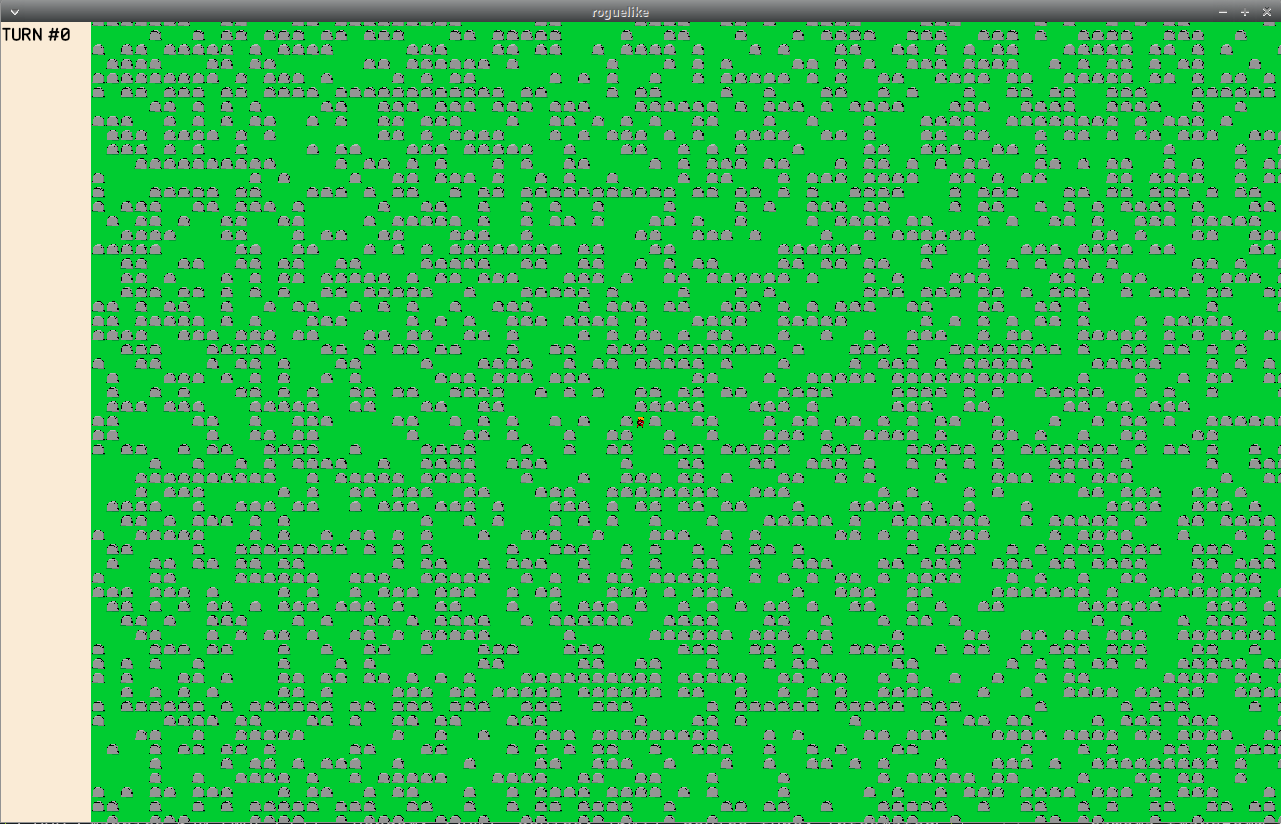
Smoothing end result
The result is captivating. While I’m not sure if I’ll use it, I’ll keep this cellular automaton implementation in my toolkit as I explore other ideas. Next up, let’s compare this terrain generation with the power of Perlin Noise.
With Perlin Noise
After doing some research, it became apparent that procedural generation is often done with a noise function. Maybe the most popular of these is the Perlin Noise, and yet finding good tutorial for beginners is hard. After a lot of looking around, I can recommend the following resources:
- Using Perlin Noise to Generate 2D Terrain and Water, by nicebyte
- Perlin Noise videos, by The Coding Train
I could have a better grasp of the underlying concepts, so I sped things up for the implementation by asking ChatGPT advices. I am not sure the end result is 100% Perlin Noise, but it seems working. Here’s the end result code:
use rand::seq::SliceRandom;

pub struct PerlinNoise {
    pub permutation: [u8; 512],
}

impl PerlinNoise {
    pub fn new() -> Self {
        PerlinNoise {
            permutation: Self::generate_permutation(),
        }
    }

    fn generate_permutation() -> [u8; 512] {
        let mut permutation: Vec<u8> = (0..=255).collect();
        let mut rng = rand::thread_rng();
        permutation.shuffle(&mut rng);

        let mut result = [0; 512];
        result[..256].copy_from_slice(&permutation);
        result[256..].copy_from_slice(&permutation);

        result
    }

    pub fn perlin_noise(&self, x: f64, y: f64) -> f64 {
        let x_wrapped = x as i32 & 255;
        let y_wrapped = y as i32 & 255;

        let x_frac = x - x.floor();
        let y_frac = y - y.floor();

        // Compute fade curves for x and y
        let u = fade(x_frac);
        let v = fade(y_frac);

        // Hash coordinates of the 8 cube corners
        let a = self.permutation[x_wrapped as usize] + y_wrapped as u8;
        let aa = self.permutation[a as usize];
        let ab = self.permutation[(a + 1) as usize];
        let b = self.permutation[(x_wrapped + 1) as usize] + y_wrapped as u8;
        let ba = self.permutation[b as usize];
        let bb = self.permutation[(b + 1) as usize];

        // And add blended results from 8 corners of the cube
        let grad_aa = grad(self.permutation[aa as usize], x_frac, y_frac);
        let grad_ba = grad(self.permutation[ba as usize], x_frac - 1.0, y_frac);
        let grad_ab = grad(self.permutation[ab as usize], x_frac, y_frac - 1.0);
        let grad_bb =
            grad(self.permutation[bb as usize], x_frac - 1.0, y_frac - 1.0);

        // Weight the contributions from each corner
        let x1 = lerp(grad_aa, grad_ba, u);
        let x2 = lerp(grad_ab, grad_bb, u);

        // And interpolate the results along y
        lerp(x1, x2, v)
    }
}

fn fade(t: f64) -> f64 {
    t * t * t * (t * (t * 6.0 - 15.0) + 10.0)
}

fn grad(hash: u8, x: f64, _y: f64) -> f64 {
    let h = hash & 15;
    let grad = 1.0 + (h & 7) as f64; // Gradient value 1-8
    if (h & 8) != 0 {
        -grad * x
    } else {
        grad * x
    }
}

fn lerp(a: f64, b: f64, t: f64) -> f64 {
    a + t * (b - a)
}
Finally, just like for the cellular automaton, I implemented the from trait
on Map:
impl From<(PerlinNoise, usize, usize)> for Map {
    /// Constructs a `Map` using Perlin noise.
    ///
    /// # Arguments
    ///
    /// - `tuple`: A tuple with three parameters representing a `PerlinNoise` struct,
    ///            the width, and the height of the map.
    ///
    /// # Returns
    ///
    /// A `Map` where the tiles are determined by Perlin noise.
    fn from(tuple: (PerlinNoise, usize, usize)) -> Self {
        let mut cells: Vec<TileType> = Vec::new();
        for i in 0..tuple.1 {
            for j in 0..tuple.2 {
                let x_scaled = i as f64 * PERLIN_NOISE_SCALE;
                let y_scaled = j as f64 * PERLIN_NOISE_SCALE;
                let noise_value = tuple.0.perlin_noise(x_scaled, y_scaled);
                if noise_value > -0.25 {
                    cells.push(TileType::Grass);
                } else {
                    cells.push(TileType::GrassWithStone);
                }
            }
        }
        Self {
            width: tuple.1,
            height: tuple.2,
            tiles: cells,
        }
    }
}
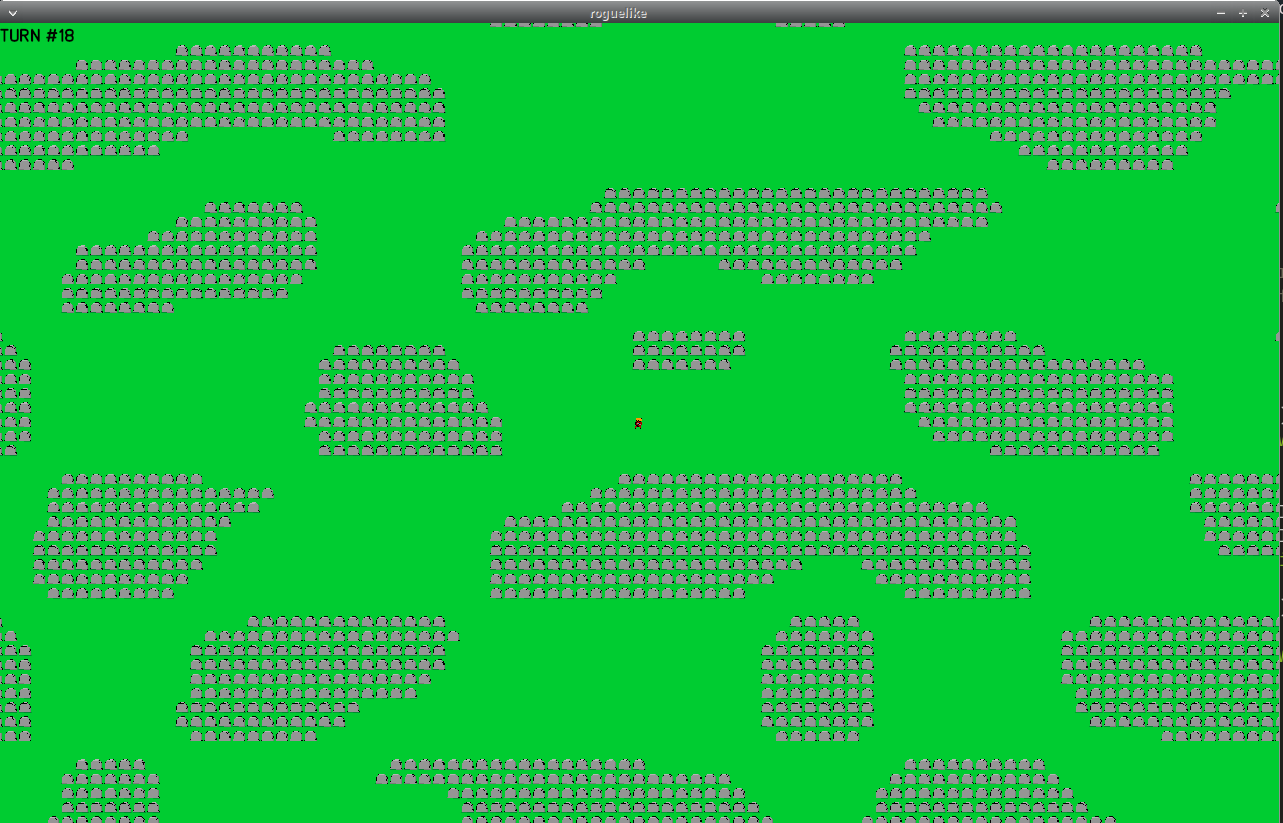
Map generated with Perlin noise
Debugging: Display tile coordinates
For preparing the development of new mechanics/systems, I decided to implement a useful way to see the tile coordinates. It mainly consist of the following code:
use crate::debug::constants::*;
use crate::prelude::*;
use bevy::prelude::*;

#[derive(Component)]
pub struct TileCoordinateLabel;

pub fn spawn_tile_coordinate_labels(
    commands: &mut Commands,
    asset_server: Res<AssetServer>,
    map: &Map,
) {
    for i in 0..map.height {
        for j in 0..map.width {
            let tile_position = MapPosition { x: j, y: i };
            let (text_x, text_y) = calculate_sprite_position(&tile_position);
            commands.spawn((
                TileCoordinateLabel,
                Text2dBundle {
                    text: Text::from_section(
                        format!("({},{})", j, i),
                        TextStyle {
                            font: asset_server.load("fonts/GABOED.ttf"),
                            font_size: TILE_COORDINATE_LABEL_FONT_SIZE,
                            color: TILE_COORDINATE_LABEL_FONT_COLOR,
                        },
                    ),
                    transform: Transform::from_xyz(
                        text_x,
                        text_y,
                        Z_INDEX_TILE_COORDINATES,
                    ),
                    ..Default::default()
                },
            ));
        }
    }
}

pub fn despawn_tile_coordinate_labels(
    commands: &mut Commands,
    label_entities: Vec<Entity>,
) {
    for entity in &label_entities {
        commands.entity(*entity).despawn();
    }
}

pub fn show_tile_coordinate_labels(
    mut commands: Commands,
    asset_server: Res<AssetServer>,
    query_map: Query<&Map>,
) {
    let map = query_map.single();
    spawn_tile_coordinate_labels(&mut commands, asset_server, map);
}

pub fn hide_tile_coordinate_labels(
    mut commands: Commands,
    query_label_entities: Query<Entity, With<TileCoordinateLabel>>,
) {
    despawn_tile_coordinate_labels(
        &mut commands,
        query_label_entities.iter().collect(),
    );
}
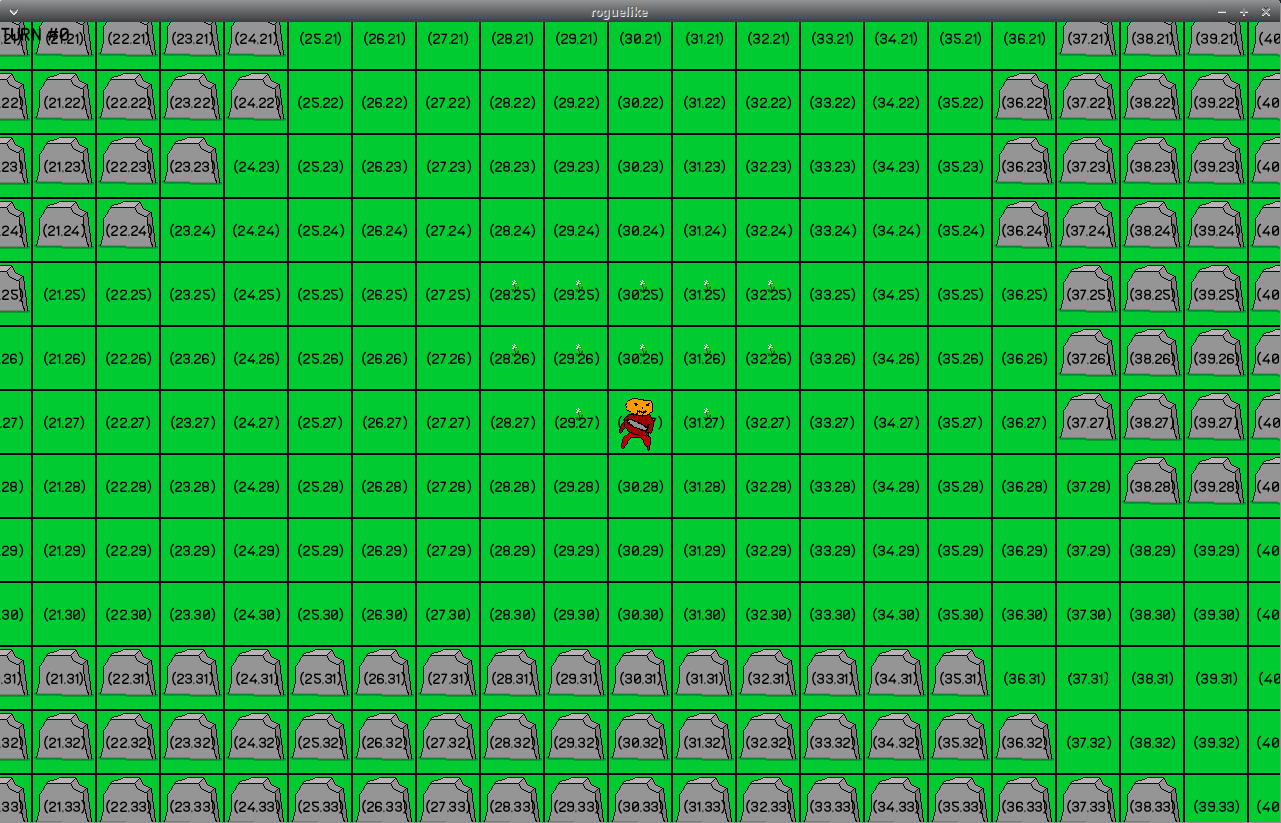
Tile coordinates appearing in Debug mode
Moreover, I created a new state called ExecutionMode, for switching between
a Release mode (how the game is intended to be seen by the end player), and
the Debug mode (only for the developer). The switch between these mode is
as easy as pressing a key:
#[derive(Debug, Clone, Copy, Default, Eq, PartialEq, Hash, States)]
pub enum ExecutionMode {
    #[default]
    Release,
    Debug,
}

impl ExecutionMode {
    pub fn flip(&mut self) {
        *self = match *self {
            Self::Release => Self::Debug,
            Self::Debug => Self::Release,
        }
    }
}
mod constants;
mod grid;
mod tile;

use constants::*;
use grid::*;
use tile::*;

use crate::prelude::*;
use bevy::prelude::*;

pub struct DebugPlugin;

impl Plugin for DebugPlugin {
    fn build(&self, app: &mut App) {
        app.add_state::<ExecutionMode>()
            .add_systems(
                Update,
                check_execution_mode.run_if(in_state(GameState::PlayerTurn)),
            )
            .add_systems(
                OnEnter(ExecutionMode::Debug),
                (show_grid, show_tile_coordinate_labels),
            )
            .add_systems(
                OnExit(ExecutionMode::Debug),
                (hide_grid, hide_tile_coordinate_labels),
            );
    }
}

pub fn check_execution_mode(
    mut keys: ResMut<Input<KeyCode>>,
    current_execution_mode: Res<State<ExecutionMode>>,
    mut next_execution_mode: ResMut<NextState<ExecutionMode>>,
) {
    if keys.just_pressed(DEBUG_MODE_KEY) {
        let mut next_state = current_execution_mode.get().clone();
        next_state.flip();
        next_execution_mode.set(next_state);
        keys.reset(DEBUG_MODE_KEY);
    }
}
Content: Meet Mr. Rabbit
Lastly, I wanted to provide a little bit of a content update with a new sprite. It’s just a smoll rabbit eating its carrot without bothering anyone.
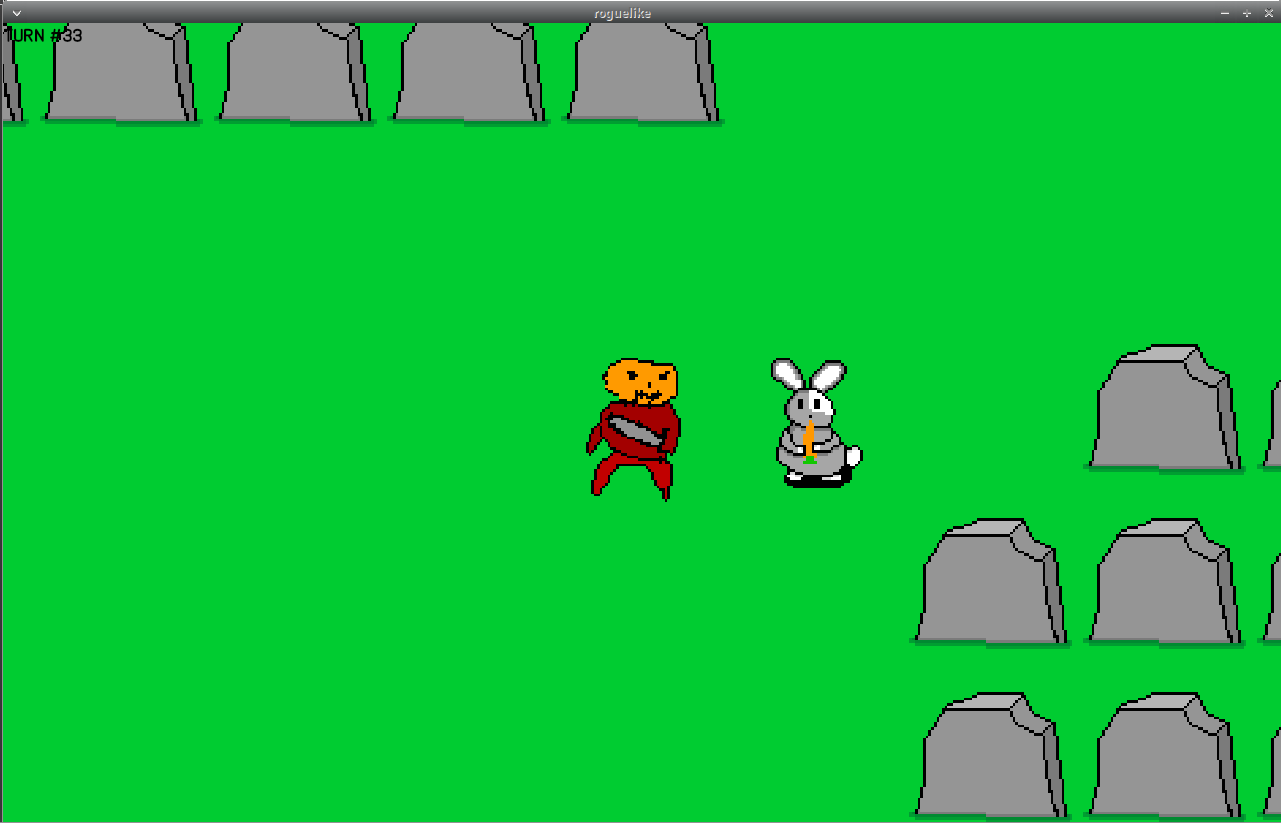
Mr. Rabbit eating its goddamn good carrot
By adding this new actor to the game, I reworked the way actors are initialized.
The previous GameState::InitializingPlayer became GameState::InitialingActor.
When entering this state, the function initialize_actors serves as a wrapper
for initializing different actors:
mod constants;
mod player;
mod rabbit;

pub use constants::*;
pub use player::*;
pub use rabbit::*;

use crate::prelude::*;
use bevy::prelude::*;

pub struct ActorsPlugin;

impl Plugin for ActorsPlugin {
    fn build(&self, app: &mut App) {
        app.add_systems(
            OnEnter(GameState::InitializingActors),
            initialize_actors.run_if(in_state(AppState::InGame)),
        );
    }
}

pub fn initialize_actors(
    mut commands: Commands,
    query_map: Query<&Map>,
    tileset: Res<TilesetMain>,
    mut next_game_state: ResMut<NextState<GameState>>,
) {
    let map = query_map.single();
    initialize_rabbits(&mut commands, map, &tileset);
    initialize_player(&mut commands, map, &tileset);
    next_game_state.set(GameState::PlayerTurn);
}
Final result
Here’s a quick video showcasing all new features/mechanics/content/etc.
Closing Thoughts
That’s all for January! I hope you enjoyed reading this entry. For me it was really interesting to implement the map generation. There’s definitely more to do in that area and I already have some ideas.
For the next entry, I think I’ll mainly focus on the level system (how to switch between different maps). This will be helpful to showcase the map generation methods.
As always, if you have any suggestions/remarks regarding the devlog content, the code or anything else, please reach out! Don’t hesitate to drop a ⭐ on the project’s page. This has the immediate effect to stop me from procrastinating.